
How to Apply Blue Car Wrap Like a Pro
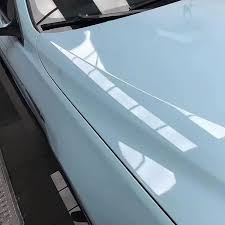
Car wraps are a fantastic way to transform the appearance of your vehicle without committing to a permanent paint job. A Blue Car Wrap can give your car a sleek, modern, and eye-catching look. However, applying a car wrap requires precision, patience, and the right tools. Follow these steps to apply a blue car wrap like a pro.
Step 1: Gather Your Tools and Materials
Before you begin, ensure you have all the necessary tools:
- High-quality blue car wrap vinyl
- Squeegee or application card
- Heat gun or hairdryer
- Utility knife or precision blade
- Surface cleaner or isopropyl alcohol
- Microfiber cloth
- Masking tape (optional)
Step 2: Prepare the Surface
Proper preparation is key to a smooth and long-lasting application. Start by thoroughly washing your car to remove dirt, grease, and debris. Use isopropyl alcohol and a microfiber cloth to clean the surface where the wrap will be applied. Pay extra attention to edges, crevices, and corners. A clean surface ensures the wrap adheres properly.
Step 3: Plan and Measure
Carefully measure your car's panels to cut the wrap into manageable sections. Add a few extra inches to each piece to account for adjustments during application. Lay out your plan and decide which panels you'll wrap first. Starting with flat surfaces, such as the hood or roof, is recommended for beginners.
Step 4: Apply the Wrap
Peel off the backing paper from the vinyl wrap, exposing the adhesive side. Align the wrap with the panel you're working on and gently place it onto the surface. Use a squeegee to smooth out air bubbles and wrinkles as you go. Work from the center outward in small sections to ensure even application.
Step 5: Use Heat for Complex Areas
For curved or uneven surfaces, use a heat gun or hairdryer to make the vinyl more pliable. Gently heat the wrap while stretching and smoothing it into place. Be cautious not to overheat, as this can damage the vinyl. Take your time with areas like mirrors, door handles, and bumpers.
Step 6: Trim Excess Vinyl
Once the wrap is fully applied and smoothed out, use a utility knife or precision blade to trim any excess vinyl. Carefully cut around edges, seams, and openings for a clean finish. Be sure not to cut too deeply to avoid damaging your car's paint.
Step 7: Final Touches
After trimming, use the heat gun again to seal the edges and ensure strong adhesion. This step helps prevent peeling over time. Inspect your work for any remaining air bubbles or imperfections, and smooth them out with the squeegee.(Blue Car Wrap)
Pro Tips for Success
- Work in a dust-free environment with good lighting.
- Take your time—rushing can lead to mistakes.
- Practice on smaller sections before tackling larger panels.
- If you're unsure about tricky areas, consider seeking professional help.
By following these steps and exercising patience, you can achieve a professional-looking blue car wrap that turns heads wherever you go. Happy wrapping!
M. Meili Informatik © 2013